Need a printable PDF file on how to install this frame?
Send us an email requesting "Recessed mat frame #421 / 422 installation manual" and we will be glad to email or fax it to you.

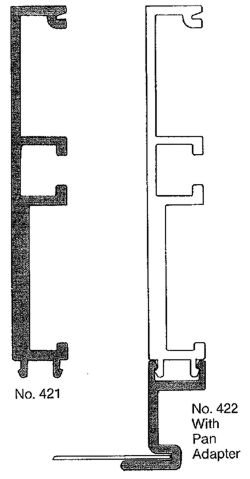
| Installation Instructions for Frame #421 and #422 |
 |
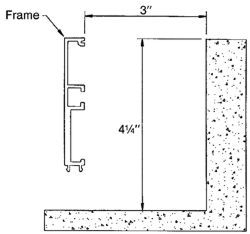
1.
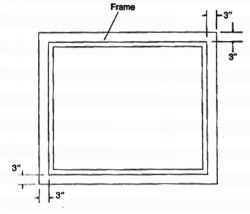
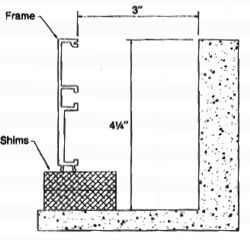
Recess must be provided in concrete flooring at location of grate. Recess should be deep enough to allow construction of the desired pit but no less than 4 ¼ to allow the cross supports to fit under the grate. The length and width should be 6 greater than the frame dimensions. This will allow 3 on all sides to maneuver the frame into position and sufficient concrete strength to support the grate. |
 |
|
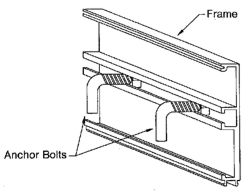
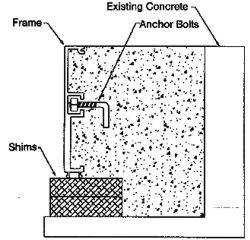
2.
Install anchor bolts (1/4 x 3) using brass nuts provided by sliding into frame from end. Space at approximately 2 foot intervals on all four sides. Anchor bolts may be bent to fit a recess if necessary. |
 |
|
3.
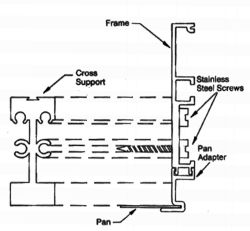
Assemble frame with the stainless steel screws provided. |
 |
|
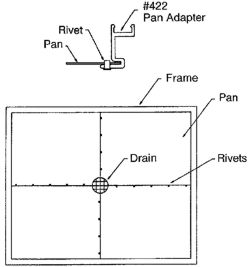
4.
Install pan material into lip on frame. Rivet pan material to pan adapter lip with pop rivets provided.
If pan is in sections, pop rivet these sections together. Locate drain and cut hole in pan. Seal joints and drain as required with silicone or caulk. |
 |
|
5.
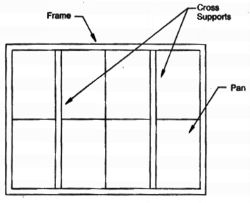
Install cross supports on frames that are 4 foot x 4 foot or larger. Fasten cross supports to frame with the stainless steel screws provided. Installation would be done after installing pan sections. |
 |
|
6.
Locate assembled unit in opening at desired position. |
 |
|
7.
Use wooden shims to level frame to position flush with final level of finished floor surface. |
 |
|
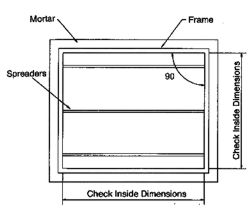
8.
Pour cement mortar around edges and trowel it in so that when hardened it provides proper support for frame and anchor bolts. |
|
|
9.
Before mortar is allowed to set up, be sure that frame sides are straight and that corners are at perfect 90 degree angles so grating will fit properly. Check inside dimensions of frame against drawing measurements to be sure they are accurate. Remember the grate is being made to fit snugly into the frame according to the drawing. If frame tends to bow inward use spreaders. |
 |
|
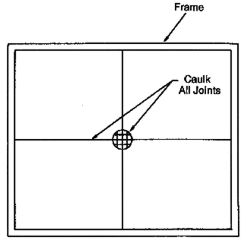
10.
If drain pipe is used with drain pan, connect pan to drain pipe. Caulk all joints and connections to prevent leakage. |
 |
|
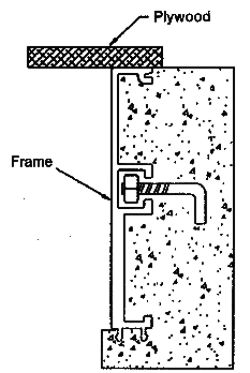
11.
Plywood or other material should be placed on top of frame to protect frame edges from damage prior to installation of grate at some later time. |
 |